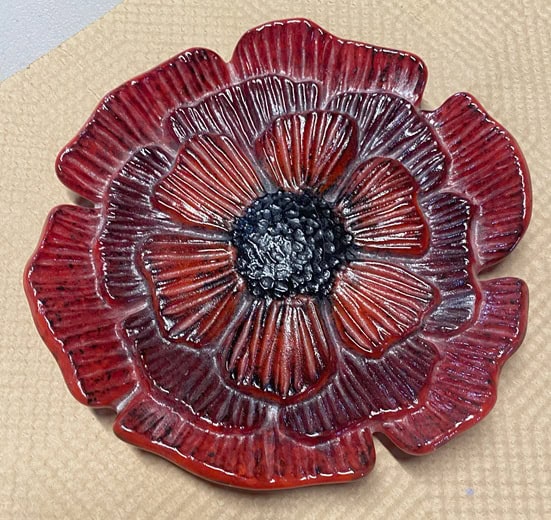
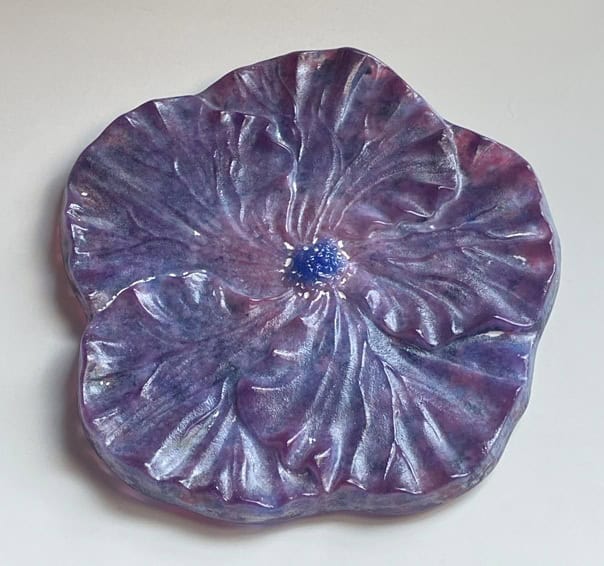
My classes usually have a minimum of three students, but sometimes life happens—and I ended up with just one student for this class. That student was Cindy, who’s taken several classes with me over the years. Rather than cancel, I invited her to create whatever her heart desired. She decided to try something new: a casted flower. While it was Cindy’s first time experimenting with casting, it wasn’t her first time crafting a glass flower. Just look at this gorgeous piece—her first flower turned out beautifully, don’t you think?
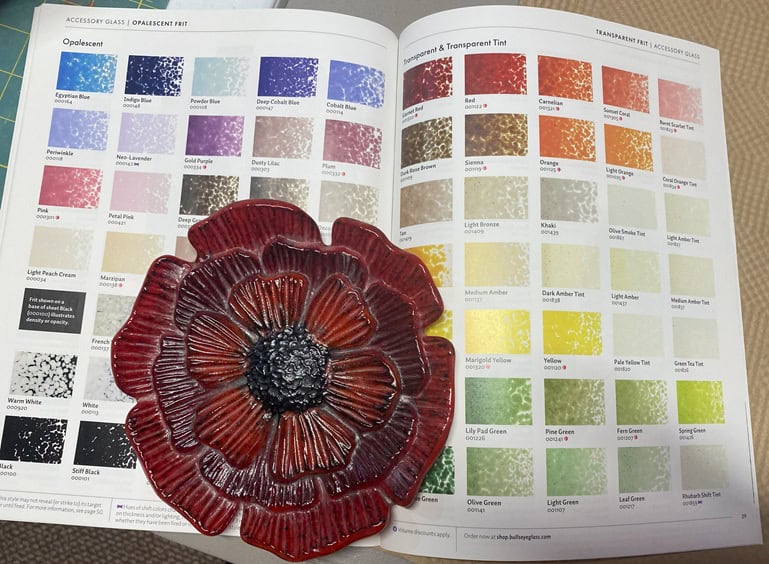
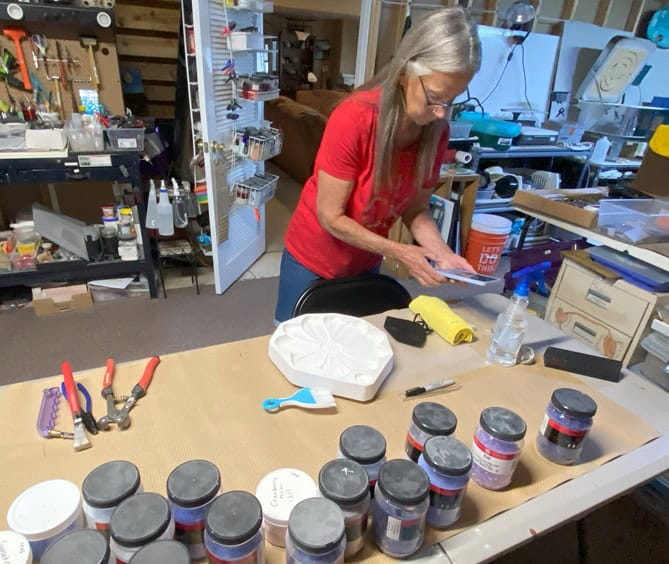
To help her get started, I showed Cindy a sample of one of my own casted flowers. We used Bullseye glass for the project, and she enjoyed flipping through the Bullseye catalog to choose her color palette. She gravitated toward a beautiful mix of purples and pinks that brought her flower to life with delicate charm.
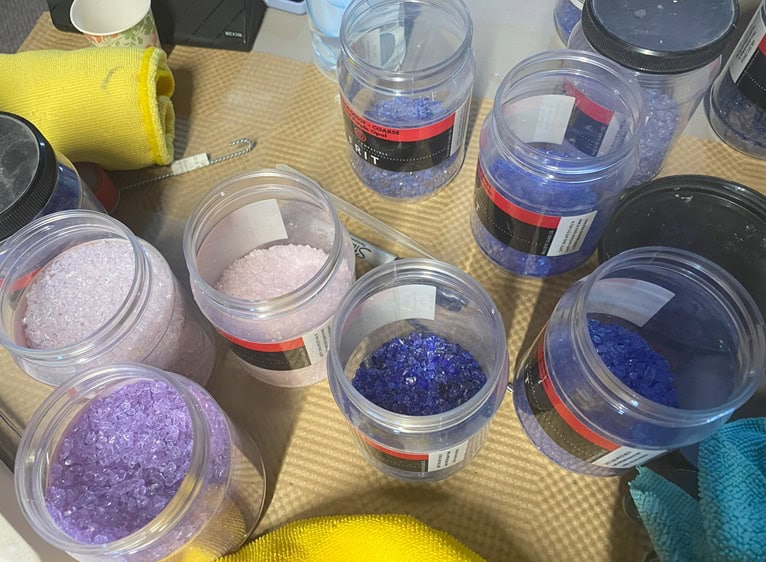
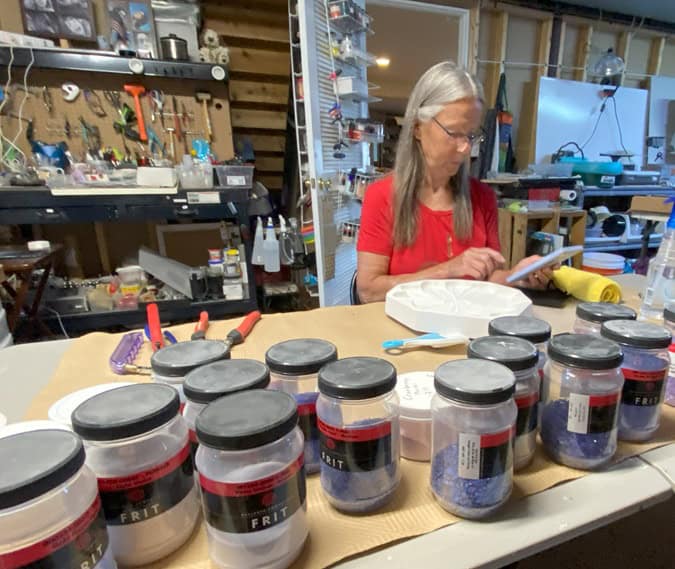
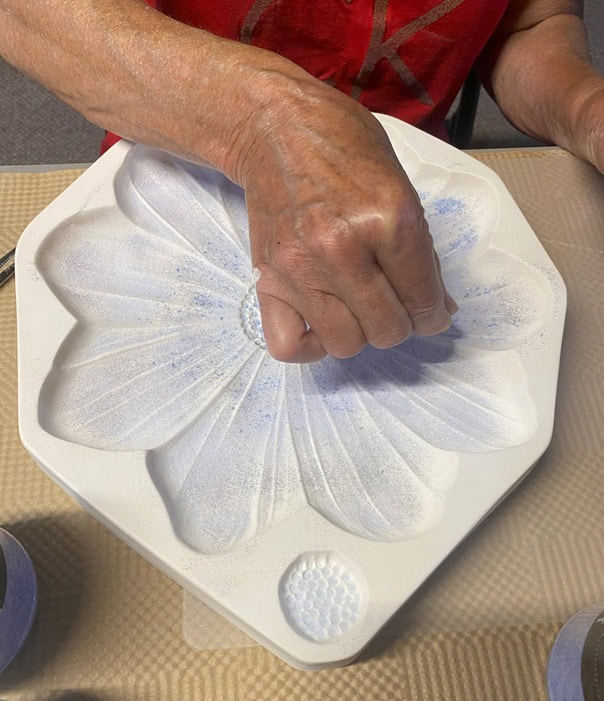
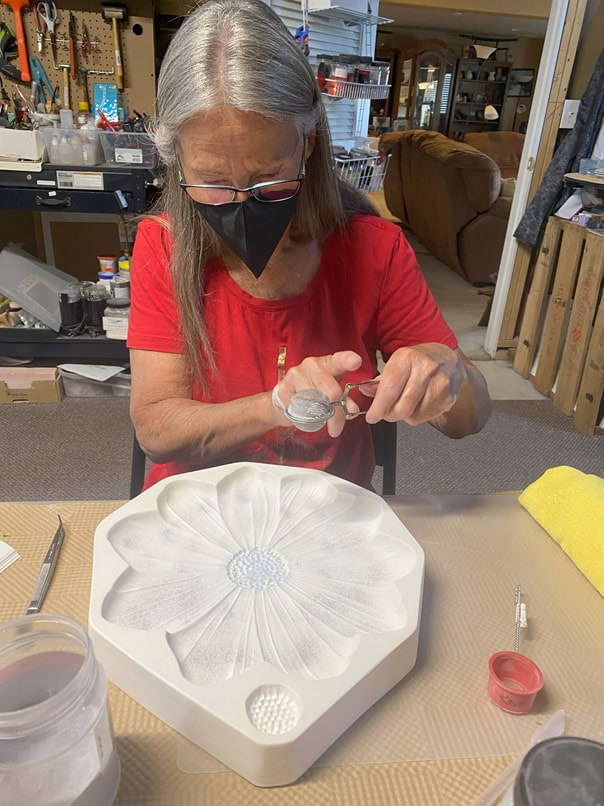
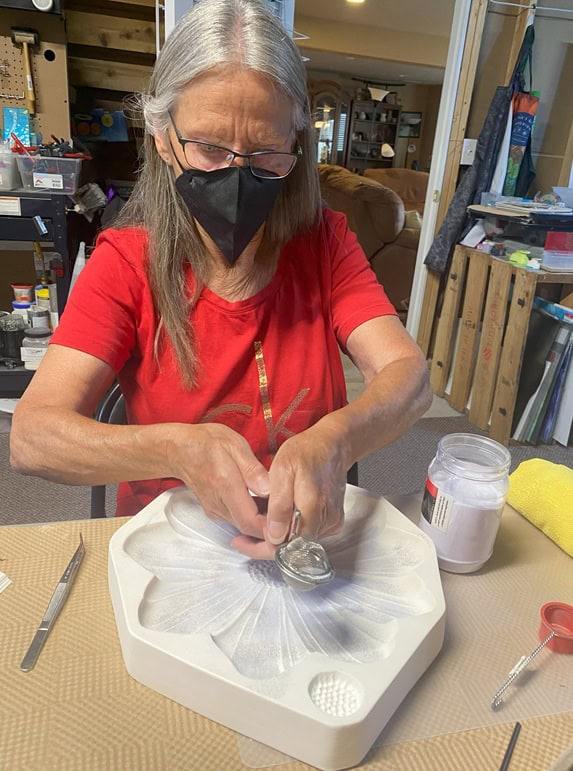
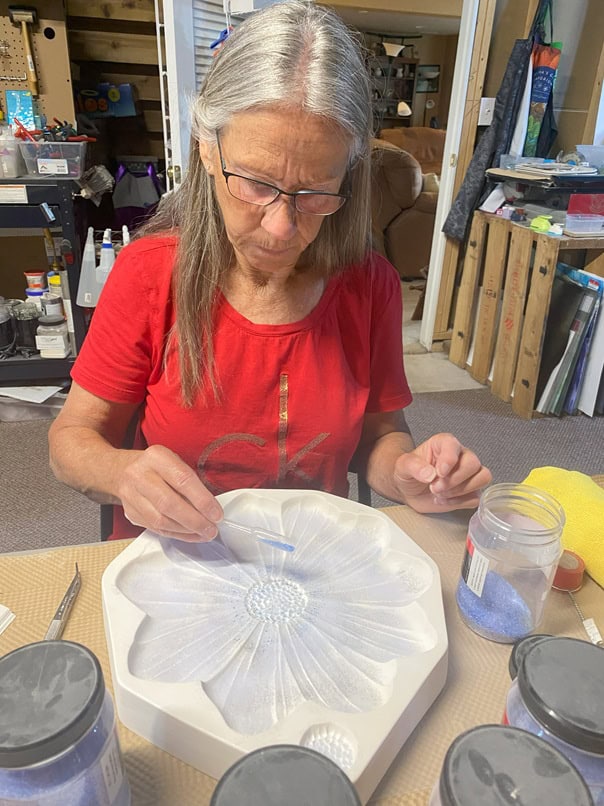
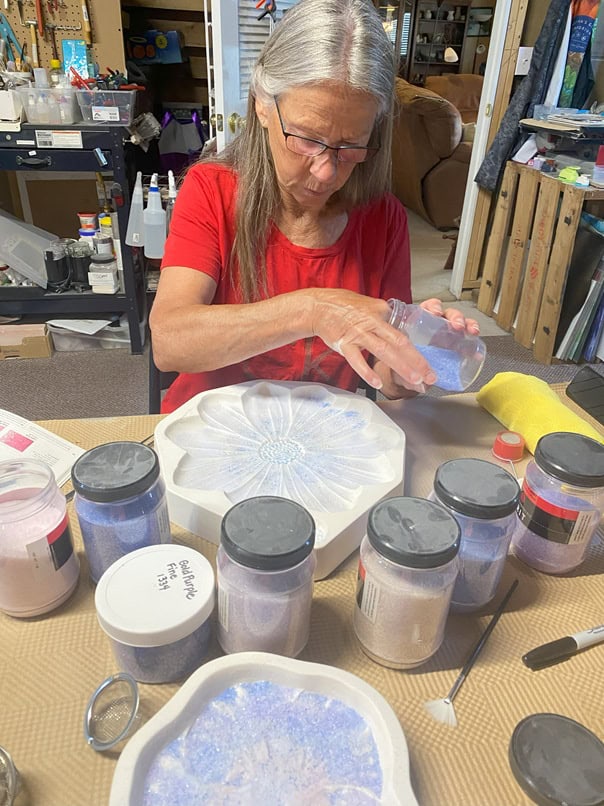
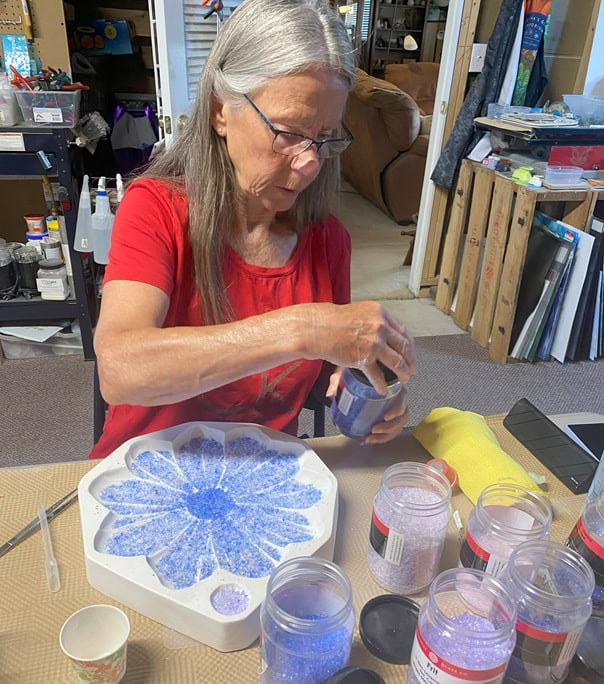
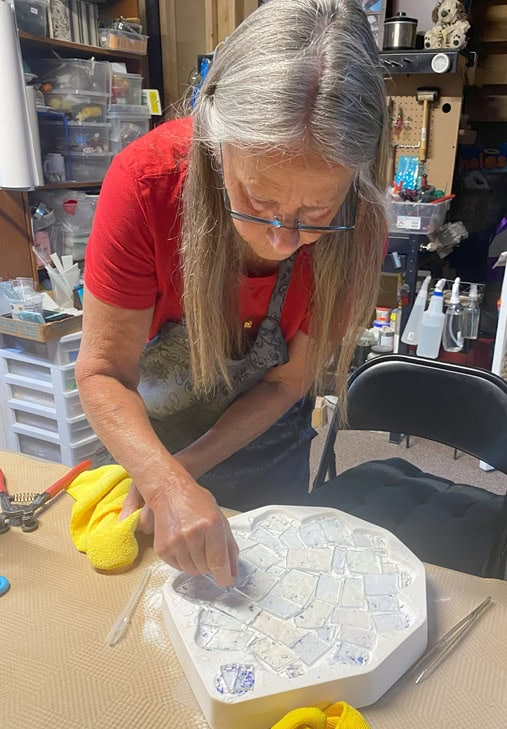
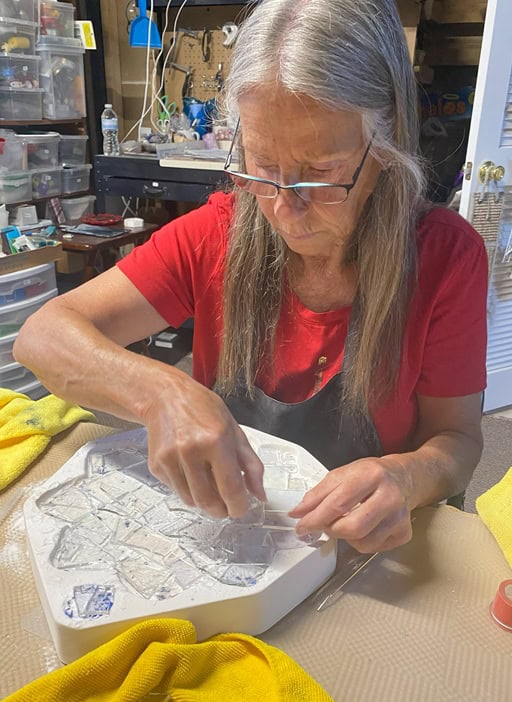
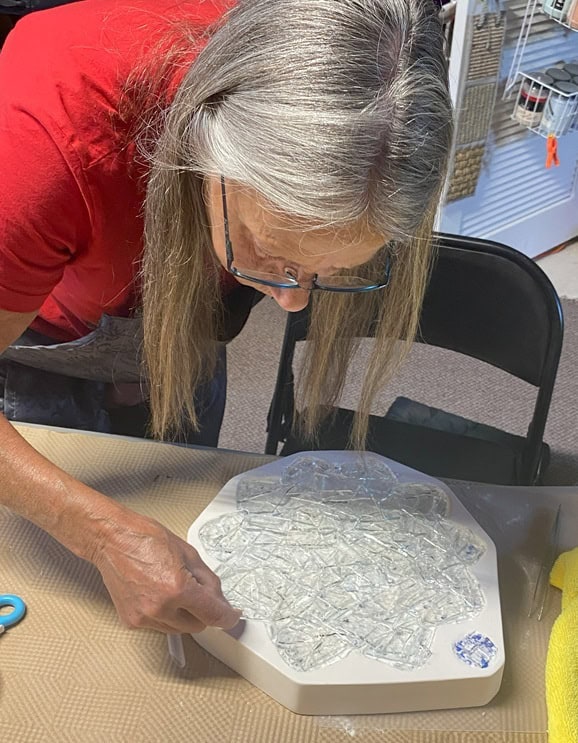
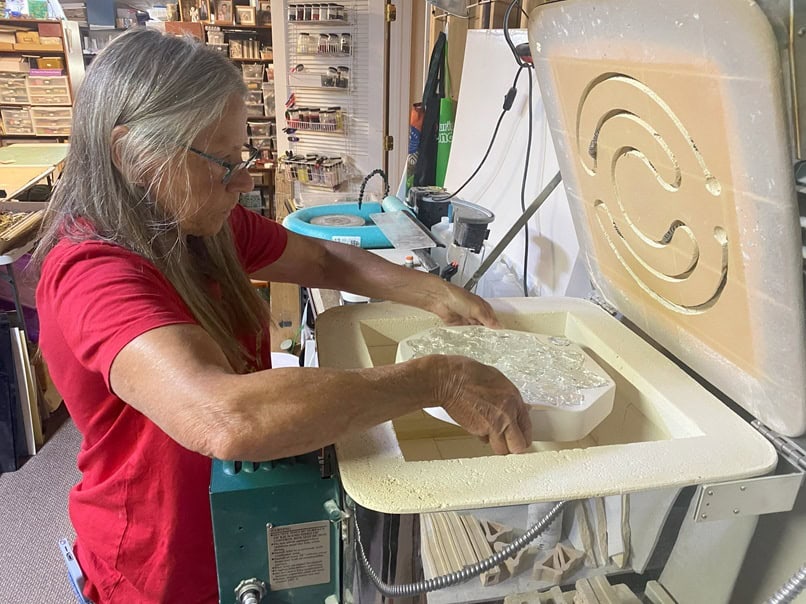
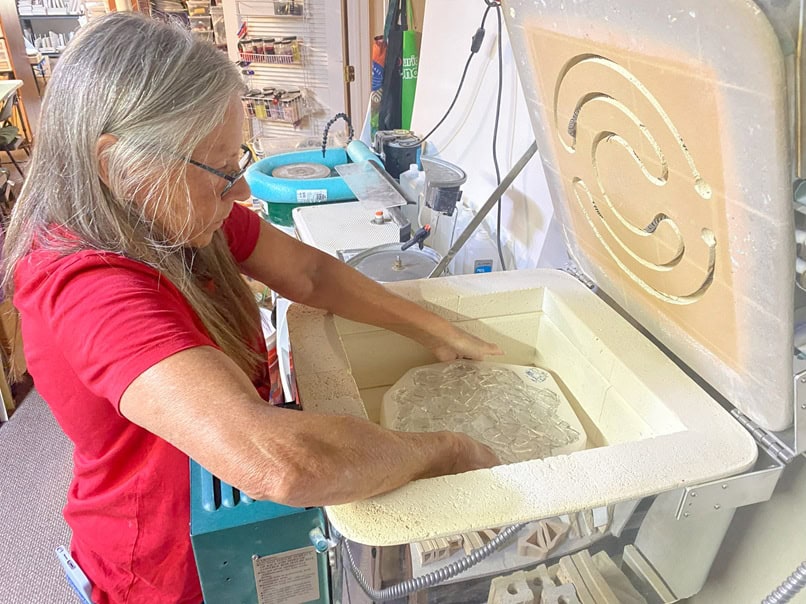
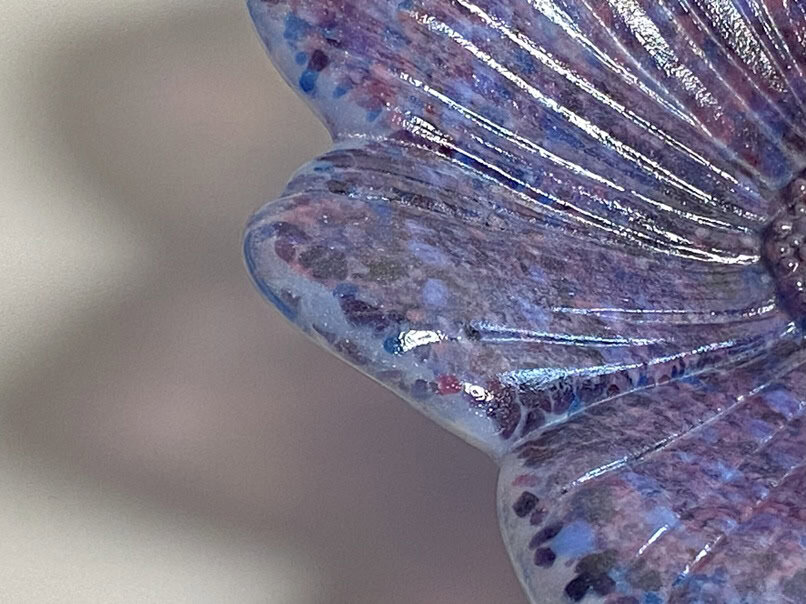
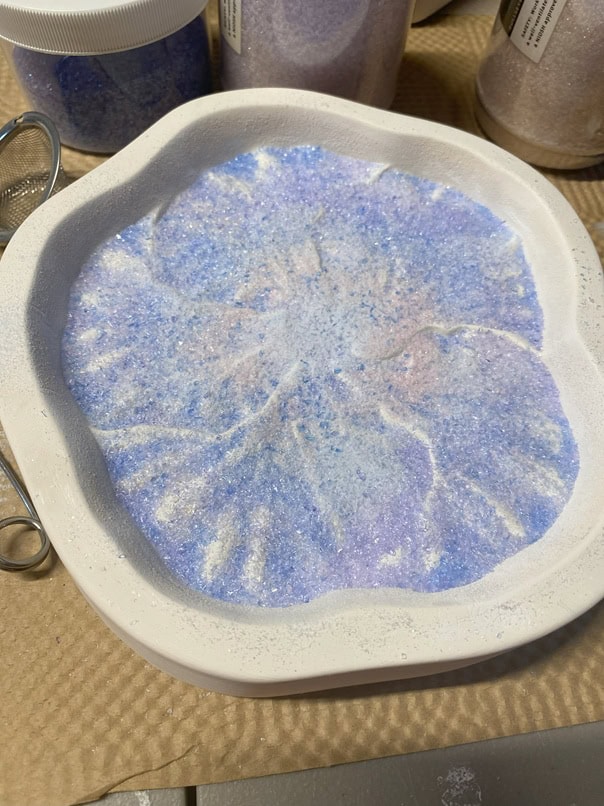
Casting involves carefully filling a mold with layers of glass frit—ranging from powder to coarse—each adding its own texture and effect. Once the mold was filled with Cindy’s chosen colors, we topped it off with clear glass to give it depth and shine. Because we used powdered glass, I made sure Cindy wore a mask for safety—it’s an essential step any time you’re working with fine particles. This was a large mold, and it took a few hours to fill, but Cindy was patient and meticulous. She took her time and truly enjoyed the process.
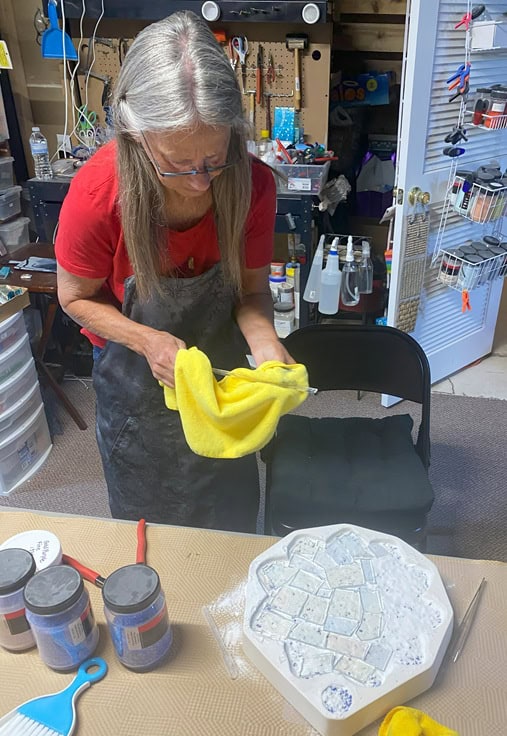

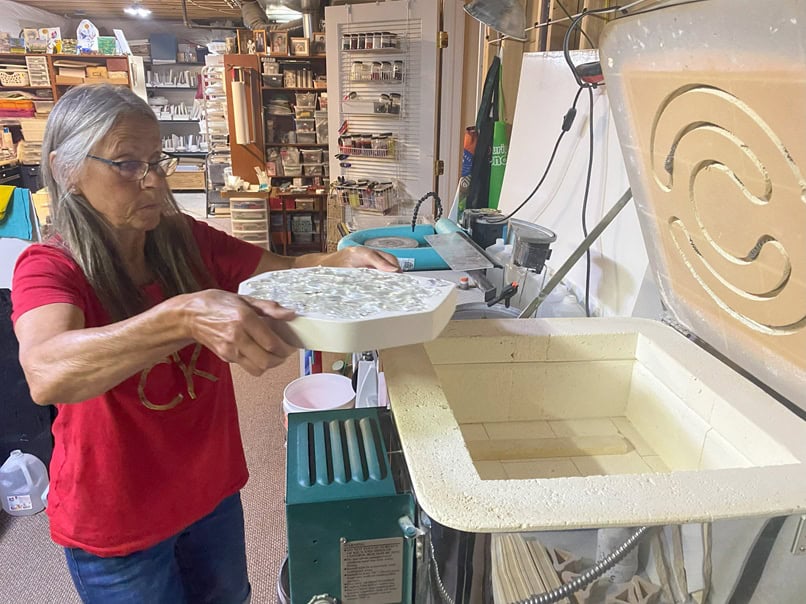
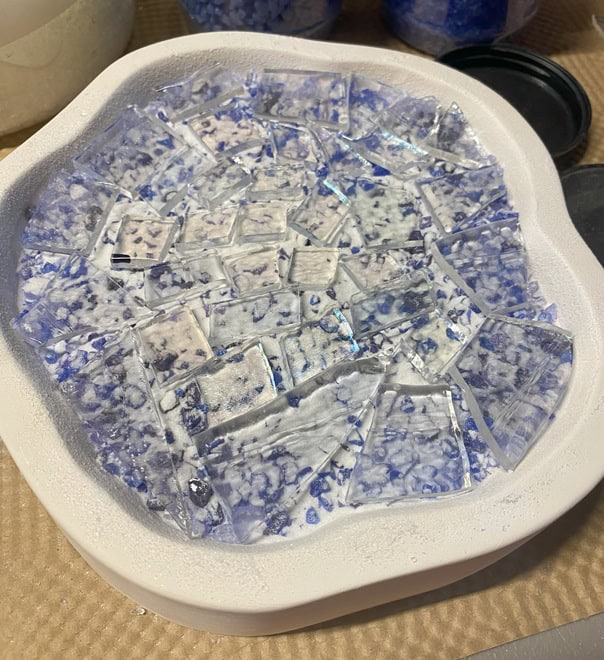
Once her mold was fully filled and ready, Cindy carefully placed it in the kiln. We fired it using a casting schedule to allow the glass to fully melt and settle into the details of the mold. As always with casting, patience is key—it takes time for the magic to happen. But the results are always worth the wait!
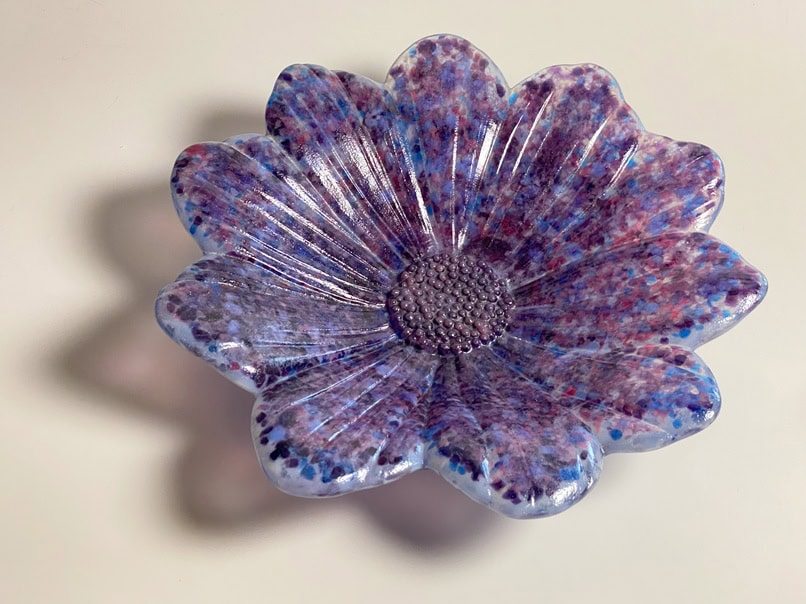
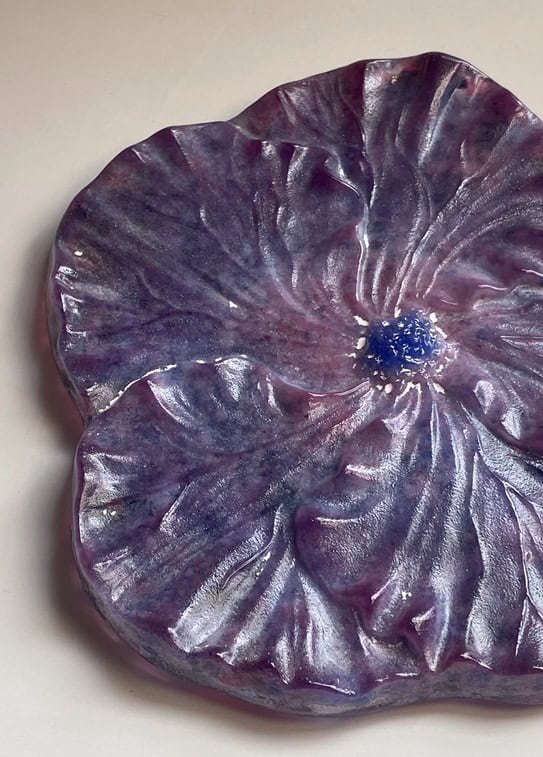
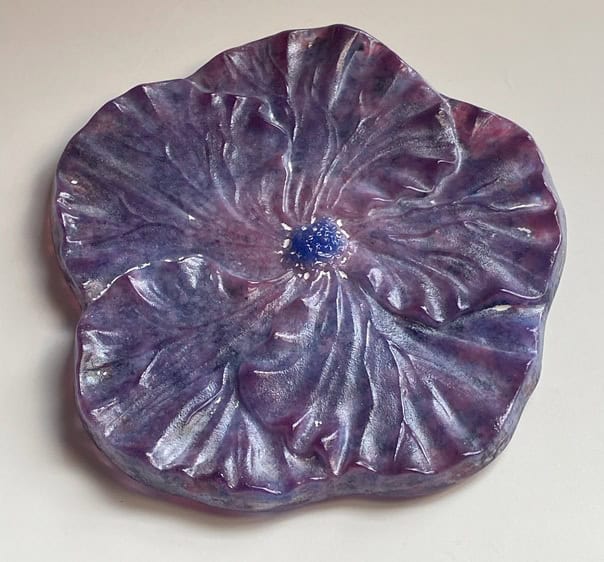
When the kiln finally cooled and we opened it up, Cindy’s casted flower turned out beautifully. The colors flowed together just as we hoped, with dark purples, pinks and blues creating an elegant, layered effect. We did wish the center had come out a touch lighter—but as any glass artist knows, purples can be a bit tricky in the kiln. Still, the overall result was stunning, especially for her first casting!
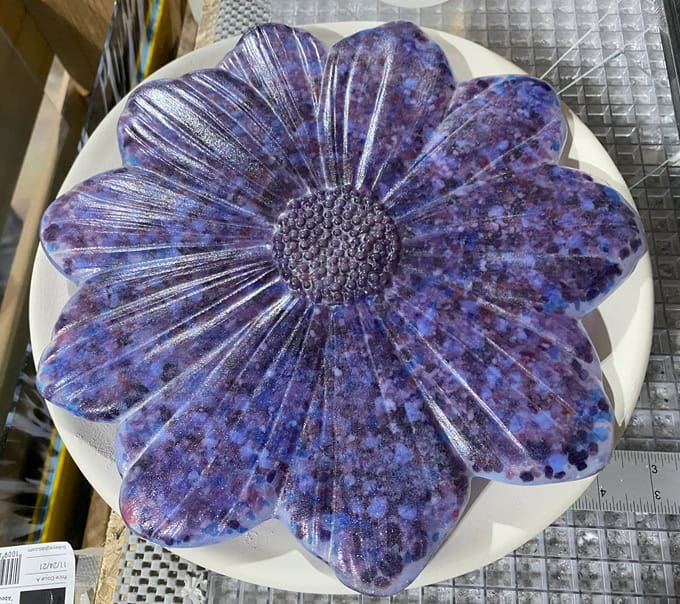
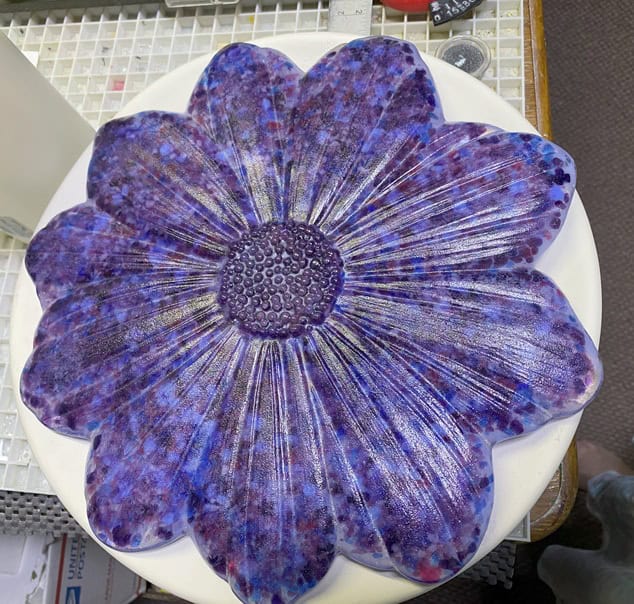
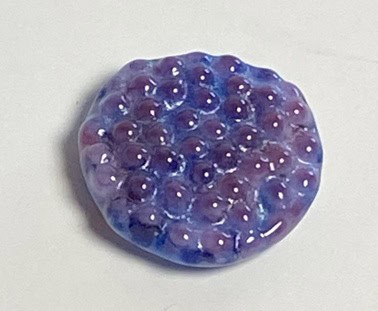
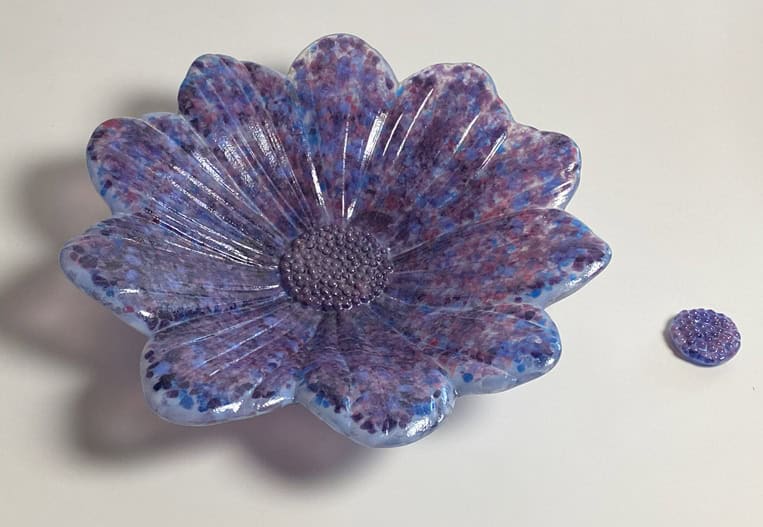
Here’s Cindy’s finished flower—full of rich purples, soft pinks, delicate violets, and a hint of blue. The colors blended beautifully, giving it a soft, almost watercolor-like feel. She also created a matching center piece that can be used as either a decorative magnet or placed in the middle of the flower to complete the look. It was such a joy to watch her bring this piece to life—her creativity and color choices truly made it one of a kind. A perfect center piece.


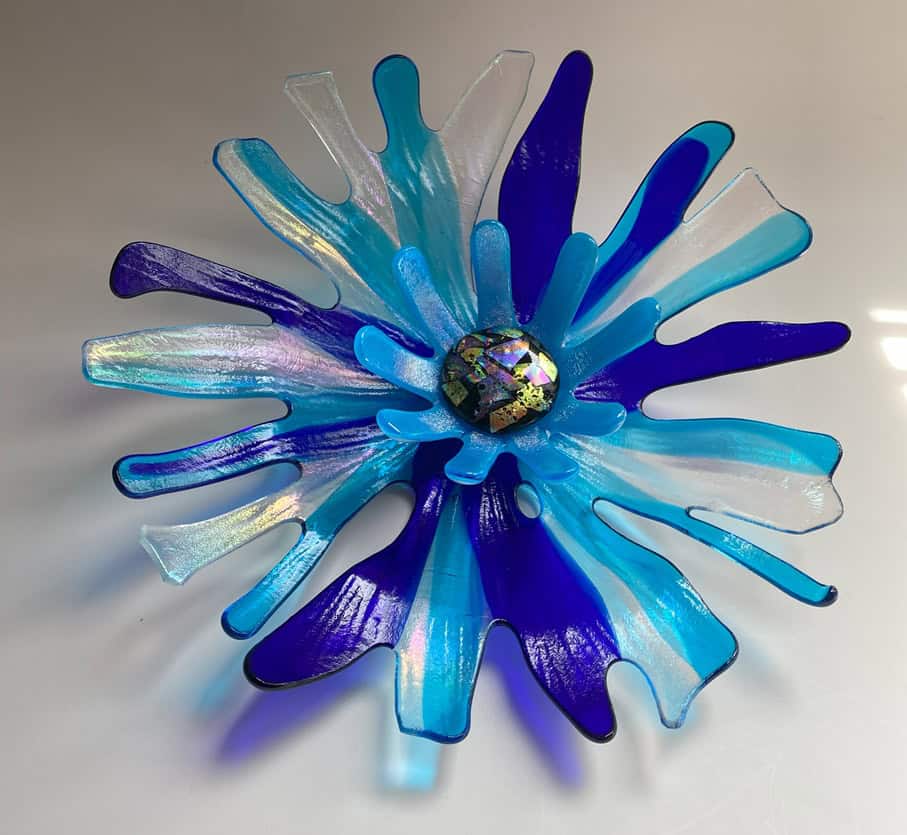
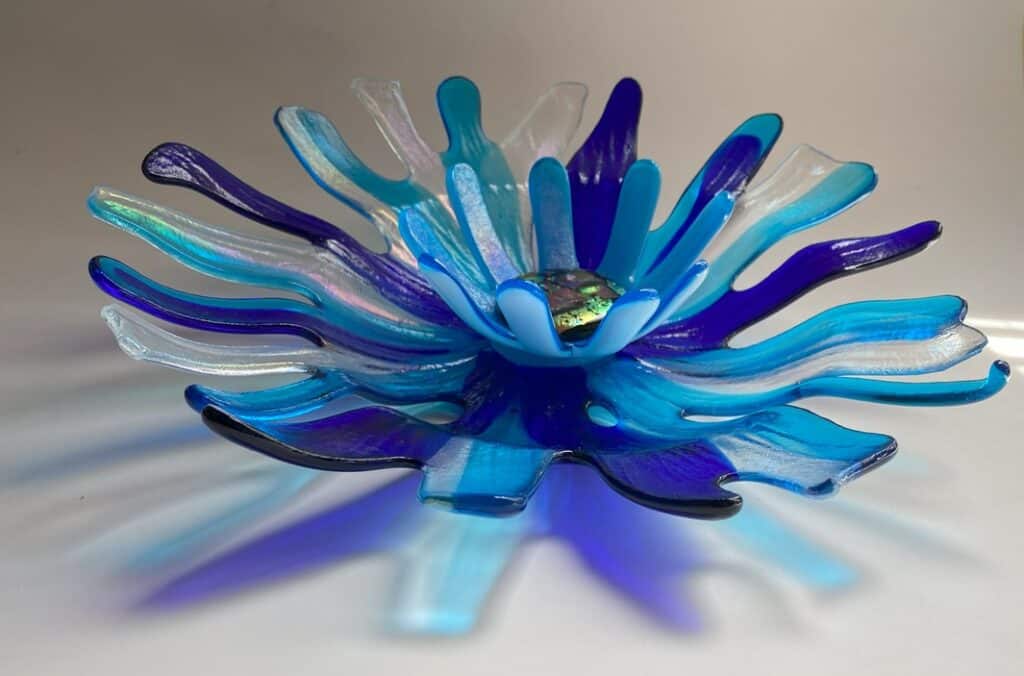
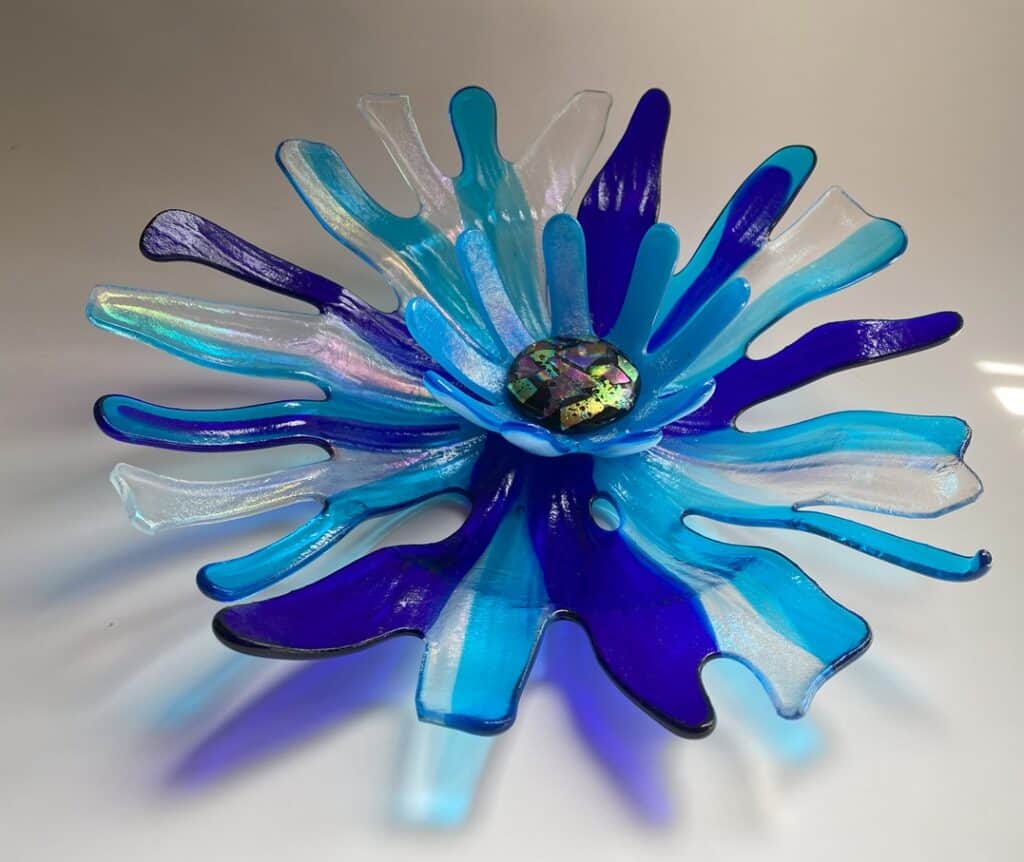
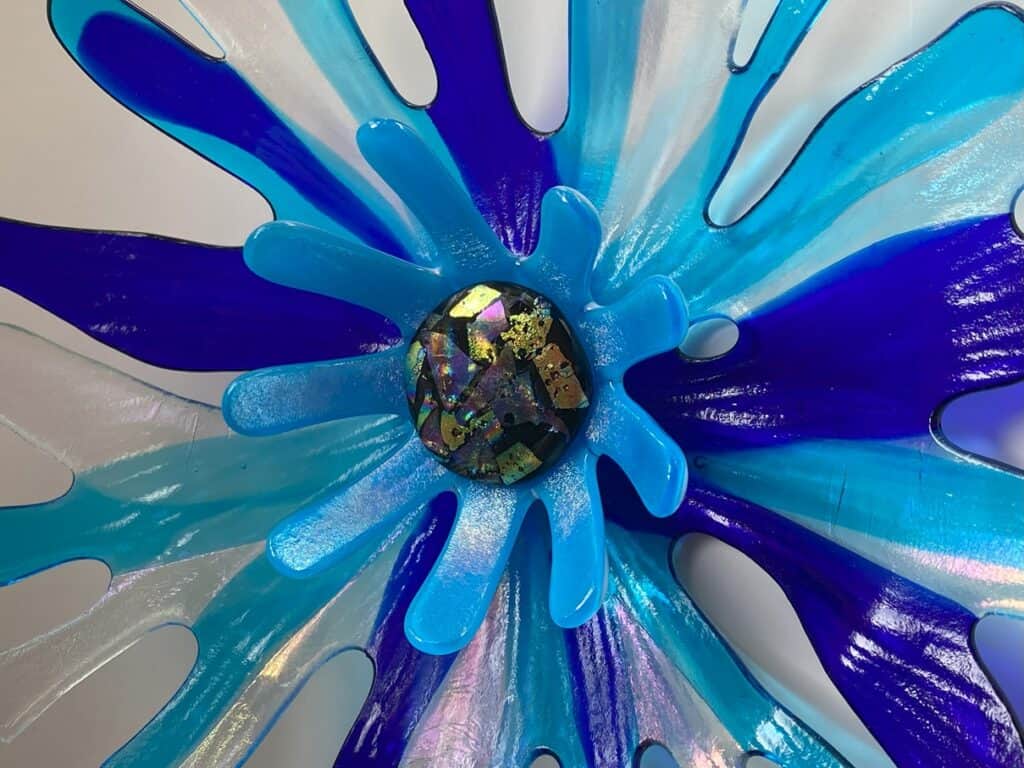
Since it was just the two of us in the studio that day, I decided to make a flower too! It’s always fun to create alongside my students—it keeps me inspired and allows me to experiment right along with them. Here’s a peek at my flower. I haven’t had a chance to slump it yet, but I’m excited to see how it turns out once it’s shaped and finished.
I really enjoy offering more advanced classes like this—it’s not only fun for me, but it gives my students a chance to try something new and challenge themselves creatively. Whether it’s experimenting with color, learning a new technique like casting, or just enjoying the slower pace of a one-on-one session, these moments are some of my favorites. I’m so proud of what Cindy created, and I’m already looking forward to the next time I can share this kind of experience with another eager glass artist.
If you’d like to see more of my fused glass creations, please visit my website: Elegant Fused Glass by Karen. While you’re there, take a moment to explore the full site—and don’t forget to check out my Elegant Fused Glass by Karen YouTube channel for videos, tutorials, and inspiration! Want to stay up-to-date with my latest projects, classes, and events? Be sure to sign up for my monthly newsletter, published on the last day of each month. If you’re interested in taking a class, you’ll find all the details about upcoming opportunities right on my website. And of course, if you have any questions or would like to schedule a class, feel free to email me at elegantfusedglass@gmail.com. I’d love to help you create something beautiful when you’re ready!
Keeping my kilns warm,
Karen
